
Pod Device Setup Guide for Your First Fill

A new pod device should not taste burnt, leak into your pocket, or feel weak from the first puff. Most early problems come down to a few setup details: using the right e-liquid, filling the pod correctly, and giving the coil enough time to absorb liquid. This pod device setup guide covers the practical checks that make a real difference before you start using a new device.
Pod systems are designed for convenience, but they still need a careful first setup. Whether you are moving from disposables or replacing an older refillable device, taking five extra minutes at the beginning can help your pod last longer and deliver a cleaner, more consistent flavor.
Start With the Right Pod and E-Liquid
Before opening anything, confirm that the pod is made for your exact device. Pods can look nearly identical across a product range, yet use different connections, coil resistances, or airflow layouts. Forcing an incompatible pod into a device can damage the contacts or stop the device from recognizing it.
Next, choose an e-liquid suited to a pod system. Most refillable pod devices work best with salt nicotine e-liquid in a balanced, thinner formula. Very thick e-liquid may not move through the cotton efficiently, especially in compact pods with small intake ports. The result can be weak flavor, dry hits, or reduced coil life.
Your preferred strength also matters. A device with a low-resistance coil and more open airflow generally produces more vapor than a small, tight pod. What feels comfortable in one setup may feel too strong or too light in another. If you are unsure, start conservatively and adjust after a few sessions rather than making a decision from one first puff.
Pod Device Setup Guide: Fill and Prime Properly
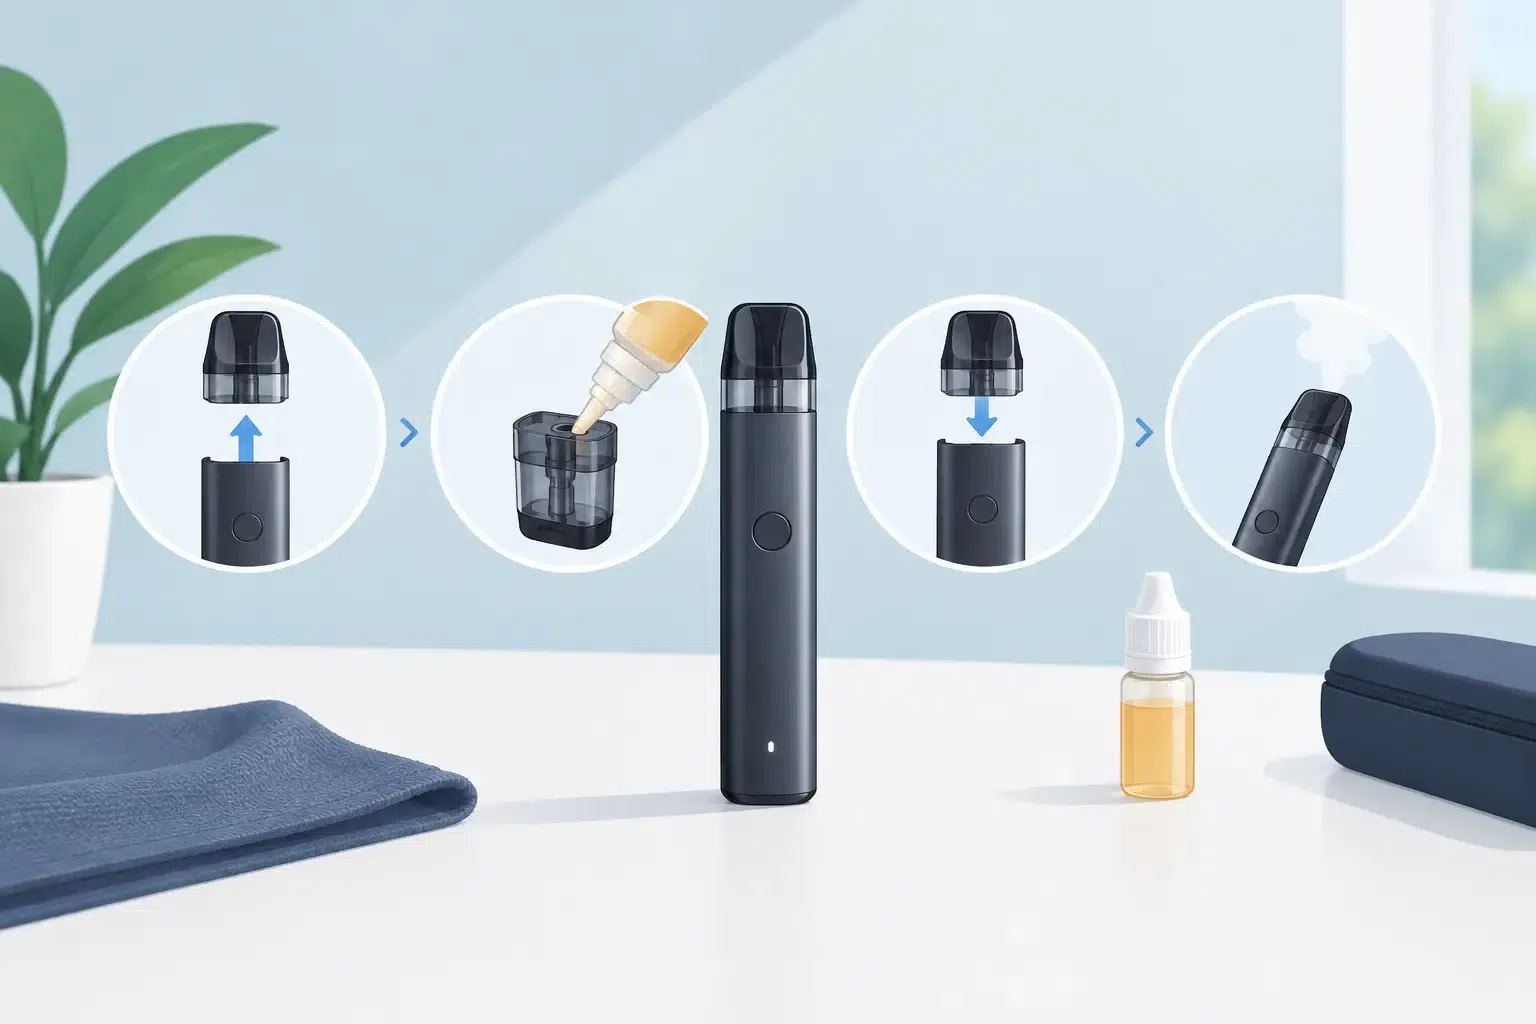
Remove the pod from the device before filling unless its design specifically allows filling while installed. Look for a silicone plug, sliding fill port, or snap-open mouthpiece. The fill port is usually marked and positioned away from the center airflow tube.
Place the bottle nozzle into the fill opening, then fill slowly. Do not put e-liquid into the central chimney or airflow channel. That channel is not a fill port, and liquid inside it can cause gurgling, spitback, or leaks through the bottom of the pod.
Leave a small amount of empty space at the top rather than filling to the absolute edge. This gives the liquid room to settle when the plug is closed and reduces pressure inside the pod. Once filled, firmly reseal the plug or mouthpiece. Wipe away any liquid from the outside, especially around the base and electrical contacts.
Priming is the step people skip most often. After filling a new pod or installing a new coil, leave it upright for at least five to ten minutes. This allows e-liquid to fully soak the cotton around the coil. A coil that is fired while dry can develop a burnt taste immediately, and that flavor usually will not disappear.
There is no benefit to taking repeated hard pulls before the device is ready. A gentle first puff after the waiting period is enough to test that the wick is saturated and airflow is clear.
If Your Pod Uses Replaceable Coils
Some pod devices use a separate coil that clicks into the bottom of the pod. Before inserting it, place a few drops of e-liquid directly onto the visible cotton openings if the manufacturer instructions allow it. This is called manual priming and can speed up saturation.
Push the coil in evenly until it sits flush. An incomplete fit is a common cause of leaking from the bottom of the pod. After assembling the pod, fill it, let it sit upright, and follow the same five-to-ten-minute wait time. Do not assume manual priming replaces the resting period.
Check the Battery, Power Setting, and Airflow
Charge a new device before relying on it for the day. Many pod devices arrive with a partial charge, but that does not mean the battery is fully ready. Use the supplied cable or a suitable low-power charging source, and avoid leaving the device charging unattended or overnight.
If your device has a power button, follow the click pattern in its instructions to turn it on or off. A common setup uses five quick clicks, but this is not universal. Button-operated devices are worth switching off before carrying in a bag or pocket to prevent accidental firing.
Some devices automatically set power based on the pod installed. Others have wattage controls or low, medium, and high modes. Start at the lower recommended setting with a new pod. Higher power can increase warmth and vapor, but it also uses more e-liquid and battery, and it can shorten coil life when set beyond the coil’s range.
Adjustable airflow is equally personal. A tighter setting creates a more restricted draw, while an open setting allows more air through the pod. Begin near the middle, take a few relaxed puffs, then make small adjustments. Closing airflow too much can make the draw feel difficult. Opening it too far may make the vapor feel cooler or reduce flavor concentration.
Take the First Puffs Slowly
Your first puffs are a setup test, not a race to get the biggest cloud. Take slow, steady draws of two to four seconds. Pulling too sharply can flood the coil with excess liquid, particularly with a freshly filled pod.
If the flavor is clean and the vapor feels consistent, the device is ready. If you hear bubbling or receive droplets of liquid in your mouth, remove the pod and check for overfilling, an open fill plug, or liquid in the central airflow channel. Gently wipe the base of the pod and the device contacts before reinstalling it.
A faint new-coil taste can happen during the first few puffs, but a harsh burnt flavor is different. Stop using the pod if that happens. Check the liquid level, confirm the pod had enough time to prime, and make sure the power setting is not too high. Continuing to use a burnt coil will not restore it.
Prevent Leaks During Everyday Use
Even a well-designed pod can leak when it is overfilled, left in high heat, or carried on its side for long periods. Keep the device upright when possible, especially after refilling. Heat can thin e-liquid and increase internal pressure, so avoid leaving it in a hot car or direct sunlight.
Check the pod’s liquid level before it gets very low. Running a pod nearly empty makes it harder for the cotton to stay saturated, particularly during frequent use. Refill before the liquid falls below the visible wicking openings whenever possible.
Condensation is also normal. A small amount of moisture under the pod does not always mean it is leaking. Remove the pod periodically and wipe the base, contacts, and inside of the device with a dry tissue. Regular cleaning helps the device make a reliable connection and keeps auto-draw sensors working properly.
If a pod leaks repeatedly after correct filling and cleaning, inspect it for a damaged seal, crack, or loose coil. Pods are consumable parts, and replacing a worn pod is usually more effective than trying to fix one that has lost its seal.
Know When the Pod or Coil Needs Replacing
A pod or coil does not last forever. Flavor that becomes muted, a darker liquid color, reduced vapor, persistent gurgling, or a burnt taste after proper priming can all signal that it is time for a replacement. Sweetened e-liquids and frequent use may shorten coil life, while moderate use with regular refilling can extend it.
Do not wait for a completely unpleasant taste before changing a worn pod. Replacing it early protects the experience you chose the device for and prevents residue from affecting a fresh refill. Keep an extra compatible pod or coil available so a worn part does not interrupt your routine.
For adult users in Bahrain who need help identifying a compatible pod, setting a device correctly, or replacing a coil, VapeShop.bh can provide product-focused support when you order. A few minutes of correct setup turns a new pod device into the simple, dependable option it is meant to be.
Frequently Asked Questions
Confirm that the pod is made for the exact device before inserting it. Fill it correctly, then allow the coil enough time to absorb the e-liquid before using the device.
Most refillable pod devices work best with salt nicotine e-liquid in a balanced, thinner formula. Very thick e-liquid may move poorly through the cotton and can contribute to weak flavor, dry hits, or shorter coil life.
A burnt taste can happen when the coil has not had enough time to absorb liquid before use. Give the filled pod time to saturate, and check that the e-liquid is not too thick for the pod system.
Start by confirming that the pod matches the exact device and that it is filled correctly. Pods with different connections, coil resistances, or airflow layouts may not work properly when forced into an incompatible device.
Weak performance may result from using an e-liquid that is too thick for the pod, or from using a coil that has not absorbed enough liquid. Coil resistance and airflow also affect vapor production, with lower resistance and more open airflow generally producing more vapor.
Check that the pod is designed for the exact device before filling or inserting it. Similar-looking pods can use different connections, coil resistances, and airflow layouts, so compatibility should be confirmed first.
VapeShop.Orders can be paid by Cash on Delivery, BenefitPay, or credit/debit card; WhatsApp support is available at +973 66324432.